If you have a tile patio, you may need to repair a loose or cracked tile from time to time. The good news is that changing a few outdoor tiles rather than the whole patio is significantly simpler. You’ll only need a few basic tools, and the whole thing can be done in a few hours. For a fast and simple project, use the supplies and procedures provided below as a guide.
Step 1: Determine the extent of the damage
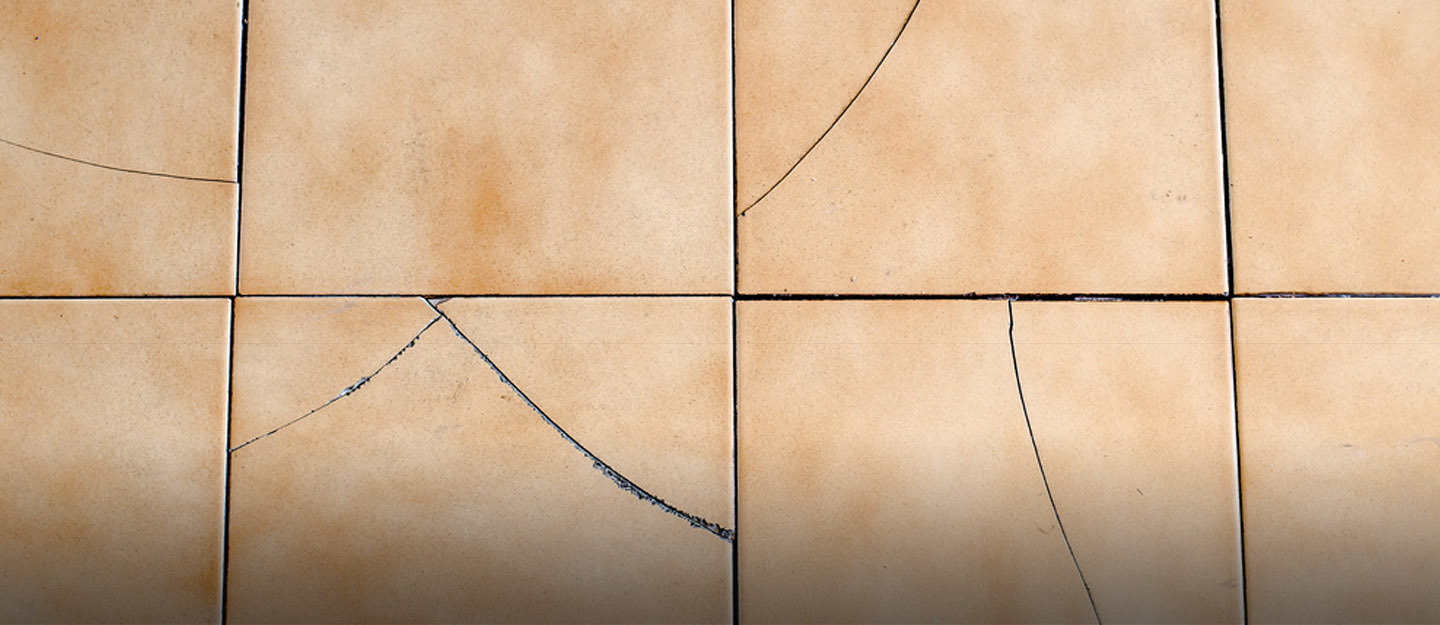
Examine your tile patio carefully before undertaking any repairs to see how much work is necessary. To avoid having to undertake numerous repairs of the same sort, locate all of the damaged areas. Tap the tops of all the terrazzo outdoor tiles on the patio using a broom handle. Outdoor tiles that shift or make a strange hollow sound may need to be replaced.
Step 2: Remove the Old Tiles
Break out the broken patio outdoor tiles using the coal chisel and hammer. Start by striking the damaged tile in the center, then work your way around the edges to avoid damaging other outdoor tiles. Chip out all of the tiless and attempt to get rid of as much grout and tile glue as you can.
Step 3: Cleaning the Repair Area
It’s critical to remove as much debris from the damaged area as possible while restoring outdoor tile patios. If you don’t remove all of the tile glue, the completed repair may have a bulge that can’t be disguised, resulting in future damaged tiles. Clean the area with a whisk sweep to remove dust and tiny pieces. Click here to read about Tips and rules to follow when installing outdoor tiles.
Step 4: Use Adhesive

Smoothly apply the tile glue. To evenly apply the glue, use a tile-laying trowel with grooves. Make sure the glue doesn’t get on the existing outdoor tiles. If you do, clean it up as soon as possible before it hardens.
Apply the glue in curved strokes, alternating the strokes to ensure that the adhesive is well worked into the surface, fixing any uneven areas and ensuring that the tiled surface is consistent. Allow 15 minutes for the glue to cure before putting the tile.
Step 5: Install the tiles and grout
Replace the outdoor tiles with the new ones. Make sure they’re facing the right way up and that there’s a matching gap between all of them. Allow 24 hours for the tiles to cure before applying grout to complete the repair. Allow 24 hours for the grout to cure.
Tile Adhesive to Restore Loose Outdoor Tiles
If your patio outdoor tiles are loose, the easiest approach to repair them is to use tile glue. This will assist in keeping the outdoor tiles in place and preventing them from getting loose.
You’ll need to clean the tiles’ surface and remove any dirt or debris before you begin. Apply a small coating of glue to the back of each tile using a trowel.
Place the tiles carefully in the chosen spot and firmly push them down. Allow 24 hours for the tiles to dry before usage.
How Do You Put Down Outdoor Tiles?
When it comes to outdoor tiles, there are a few various installation options to choose from. The usage of adhesive is one of the most frequent approaches. If you want a fast and simple installation, this is a fantastic choice.
To add glue, make sure the surface is clean and dry first. The glue should then be distributed throughout the surface using a trowel. Place the outdoor tiles where you want them and firmly push them into the glue. Before stepping on the outdoor tiles, let the glue cure fully.
Mortar is another alternative for placing exterior tiles. This is a more time-consuming method, but it may result in a more long-lasting and sturdy installation.
To use mortar, follow the manufacturer’s directions. Spread the mortar over the surface using a trowel. Place the outdoor tiles where you want them and firmly push them into the mortar. Before stepping on the outdoor tiles, let the mortar cure fully.
What Can You Do If A Patio Tile Is Loose?
A loose patio tile may be mended by applying a small coating of glue around the tile’s edge using a putty knife. Place the tile back in its original location after pressing the glue into the grout lines with a trowel. Finally, gently tap the tile into place with a rubber hammer.
Getting Ready for The Loose Tile
One of the most critical tasks in the tiling process is to prepare the loose tile. This is due to the fact that if the tile is not correctly prepared, it may loosen and fall off the wall or floor.
The following are the steps for preparing loose tile:
- Remove the grout: Break away the grout surrounding the dislodged tile using a chisel and hammer.
- Pry the tile away from the wall or the floor using a screwdriver.
- Clean: Remove the old glue and grime from the tile using a wire brush.
- Apply fresh adhesive to the back of the tile: Apply a new adhesive layer to the back of the tile.
- Install the tile: Place the tile in its original location and fasten it with a hammer and screwdriver.
- Apply a layer of grout to the tile: Apply a layer of grout to the tile.
Getting Rid of the Old Tile Adhesive
It’s a pain to remove the old glue, but it’s vital to effectively attach it to the new adhesive. To get rid of the old glue, you’ll need to apply a solvent that will dissolve it. There are other solvents that may be utilized, but acetone is the most popular.
- Scrape away the old adhesive: Using a putty knife or other scraping instrument, scrape away as much of the old glue as possible.
- Soak in acetone: After removing as much glue as possible, soak a cloth in acetone and apply it over the adhesive. Allow a few minutes for the acetone to absorb.
- Scrape away any residual glue with a scraper or other tool.
- Repeat if necessary: Continue this technique until all of the glue has been removed.
When dealing with acetone, use gloves, and eye protection since it may be dangerous if breathed or consumed. Make sure there’s adequate airflow.
Using a New Tile Adhesive

To use the new glue, follow these steps:
- Use a solvent like acetone or alcohol to clean the area where the glue will be placed. Allow for thorough drying of the surface.
- Follow the manufacturer’s directions for applying the adhesive to the surface.
- Allow the glue to dry fully before testing it to make sure it’s secure.